

Where On Google Do I Register A Recaptcha Key
Creating reCAPTCHA keys
This folio explains how to create reCAPTCHA keys, likewise known as site keys, to verify user interactions on your web pages and mobile applications.
reCAPTCHA site keys correspond how reCAPTCHA Enterprise is configured for a site or an app. The configuration includes important options such as whether to prove CAPTCHA challenges. reCAPTCHA site keys are unlike from API keys.
Before you begin
-
Choose the best method for setting up reCAPTCHA Enterprise in your environment and complete the setup.
-
Choose the advisable key type.
-
reCAPTCHA site keys for mobile applications (mobile keys) are accessible subsequently a security review. Contact our sales team to onboard your site to this feature.
Creating a site key
At that place is no limit on the number of reCAPTCHA keys that you can create for a project. It is best to create one reCAPTCHA key per website or mobile awarding.
Create split site keys for staging and product environments. Otherwise, yous risk polluting reCAPTCHA risk analysis with data from your exam environment.
The simplest style to create a site key is through the Deject console. Alternatively, yous tin can use the reCAPTCHA Enterprise API or the Google Cloud CLI.
Console
-
In the Deject console, get to the reCAPTCHA Enterprise page.
Go to reCAPTCHA Enterprise
-
Verify that the name of your project appears in the resource selector at the top of the page.
If you lot don't see the name of your project, click the resource selector, then select your project.
-
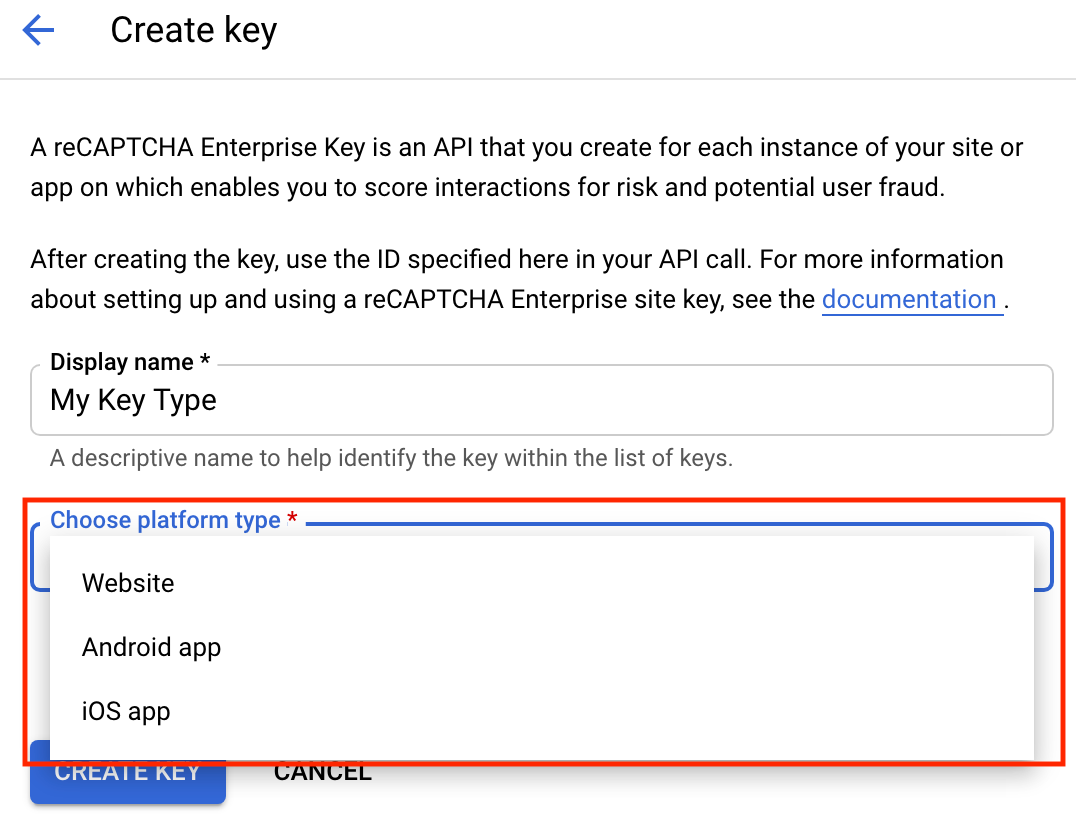
Click Create key.

- In the Brandish name field, enter a display proper noun for the fundamental.
- Create a site key for a website or mobile platform. For instructions, expand the section that corresponds with your platform.
Create site keys for websites
You lot tin can create score-based and checkbox site keys for websites.
-
From the Choose platform type drop-downwards menu, select Website.
The Domain listing department appears.
-
Enter the domain name for your website:
-
In the Domain list department, click Add a domain.

- In the Domain field, enter the proper noun of your domain.
-
Optional: To add an additional domain, click Add a domain and enter the name of some other domain in the Domain field. You can add together up to a maximum of 250 domains.
For websites, the reCAPTCHA site key is unique to the domains and subdomains that you specify. You tin can specify more than than one domain if y'all serve your website from multiple domains. If you specify a domain (for example,
examplepetstore.com), y'all do not need to specify its subdomains (for example,subdomain.examplepetstore.com).
-
- Depending on the type of site key you want to create, perform the advisable actions:
- To create a score-based site key (recommended), do the post-obit:
- Optional: If you lot want to disable domain verification or allow AMP pages, expand the Domain verification, AMP pages, and challenge section.

- To protect the reCAPTCHA site fundamental for your domain and subdomains, ensure that the Disable domain verification toggle is turned off.
Disabling domain verification is a security risk considering at that place are no restrictions on the site, so your reCAPTCHA key can be accessed and used past anyone.
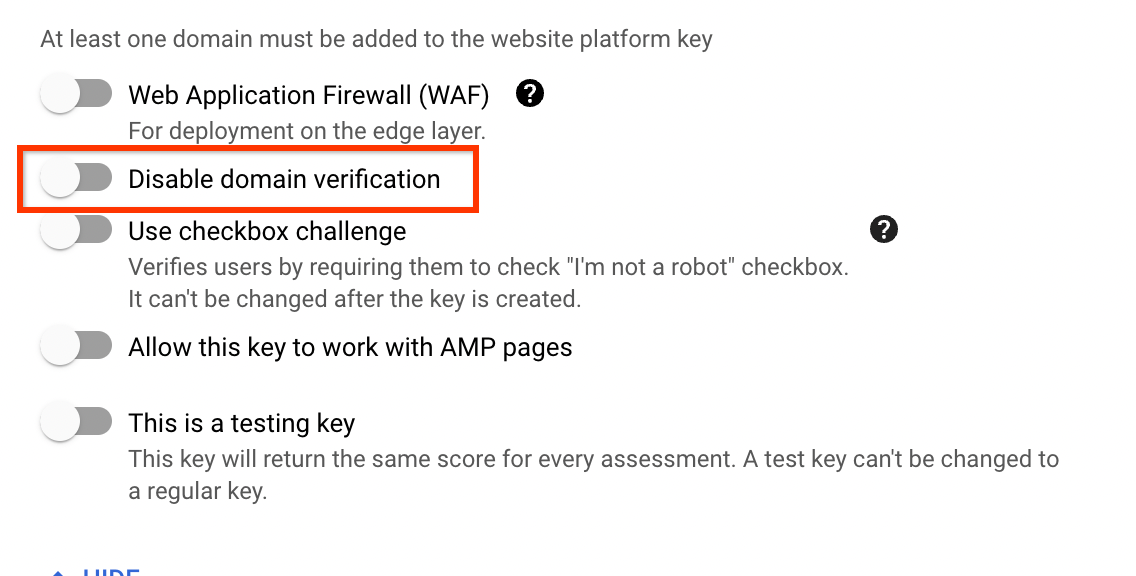
- If you lot want to allow the score-based site key to work with Accelerated Mobile Pages, (AMP), click the Allow this key to work with AMP pages toggle.
- To protect the reCAPTCHA site fundamental for your domain and subdomains, ensure that the Disable domain verification toggle is turned off.
- Click Create key.
- Optional: If you lot want to disable domain verification or allow AMP pages, expand the Domain verification, AMP pages, and challenge section.
- To create a checkbox site cardinal to show a visible challenge to your users, practise the following:
- Expand the Domain verification, AMP pages, and claiming section.
- To protect the reCAPTCHA site key for your domain and subdomains, ensure that the Disable domain verification toggle is turned off.
Disabling domain verification is a security adventure because there are no restrictions on the site, and then your reCAPTCHA key can exist accessed and used past anyone.
- Click the Use checkbox challenge toggle.

- Select the advisable Challenge security option.
The challenge security option controls the probability of a user being prompted for a secondary challenge in which users are prompted to select images based on an identified category (example, select the pictures with a motorcycle, or stairs).

If yous want to ensure the best anti-fraud protection, select Harder difficulty (more secure against bots).
If you select Easiest claiming difficulty, the users are less probable to be prompted with the visual claiming.
- Click Create fundamental.
- Expand the Domain verification, AMP pages, and claiming section.
- To create a score-based site key (recommended), do the post-obit:
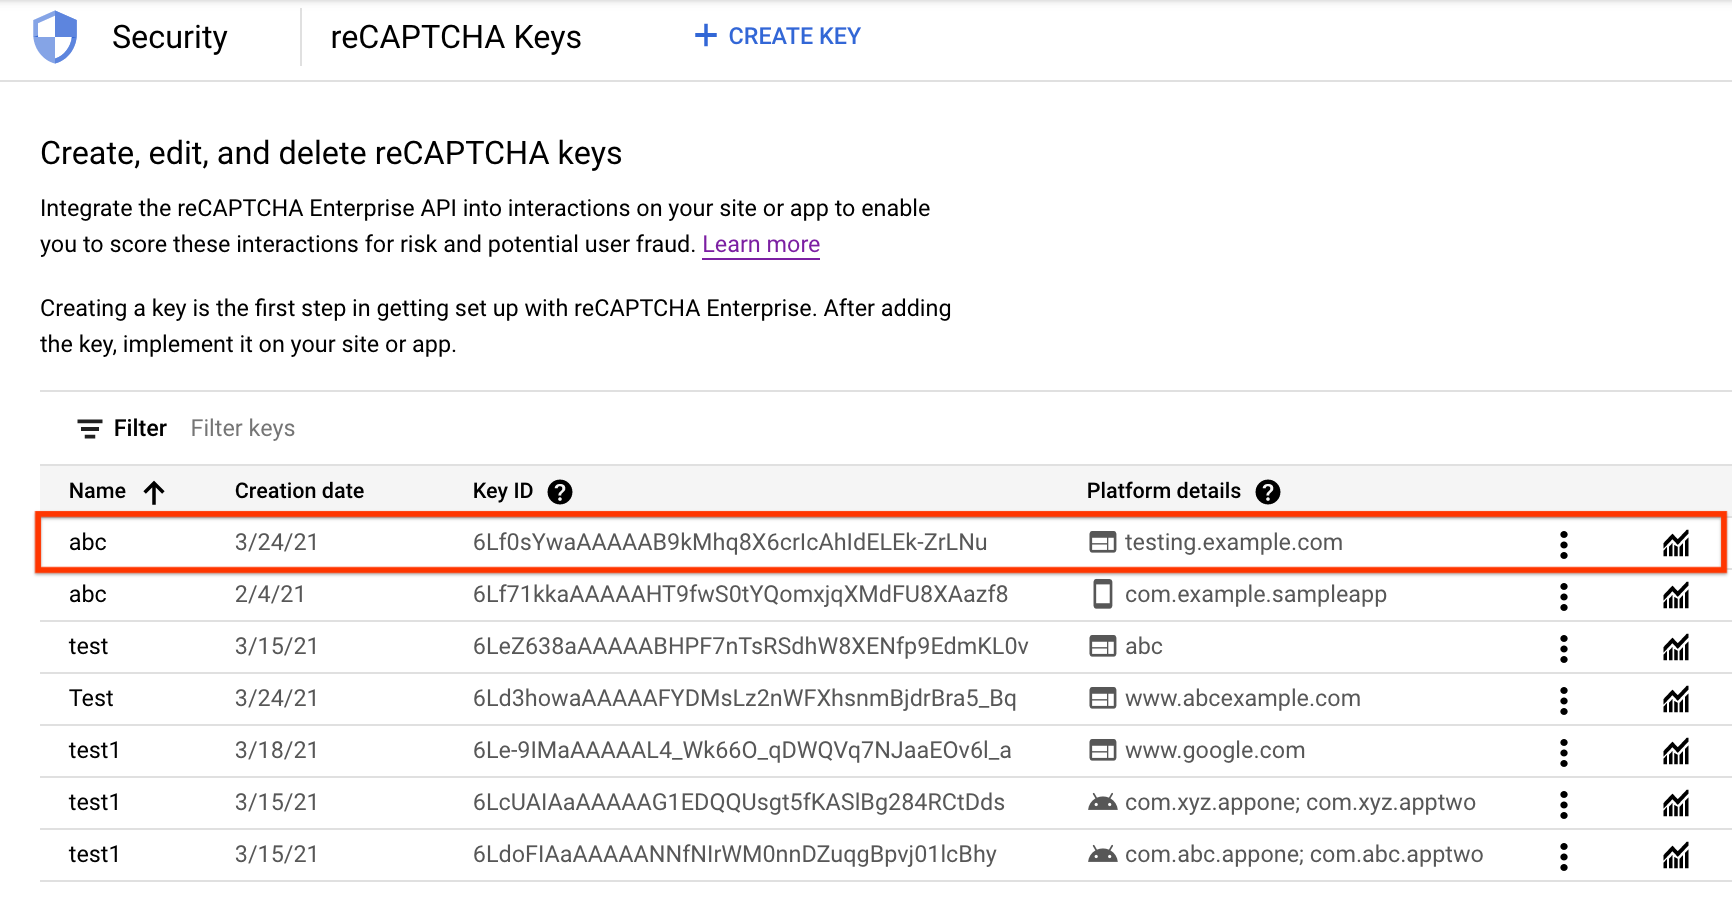
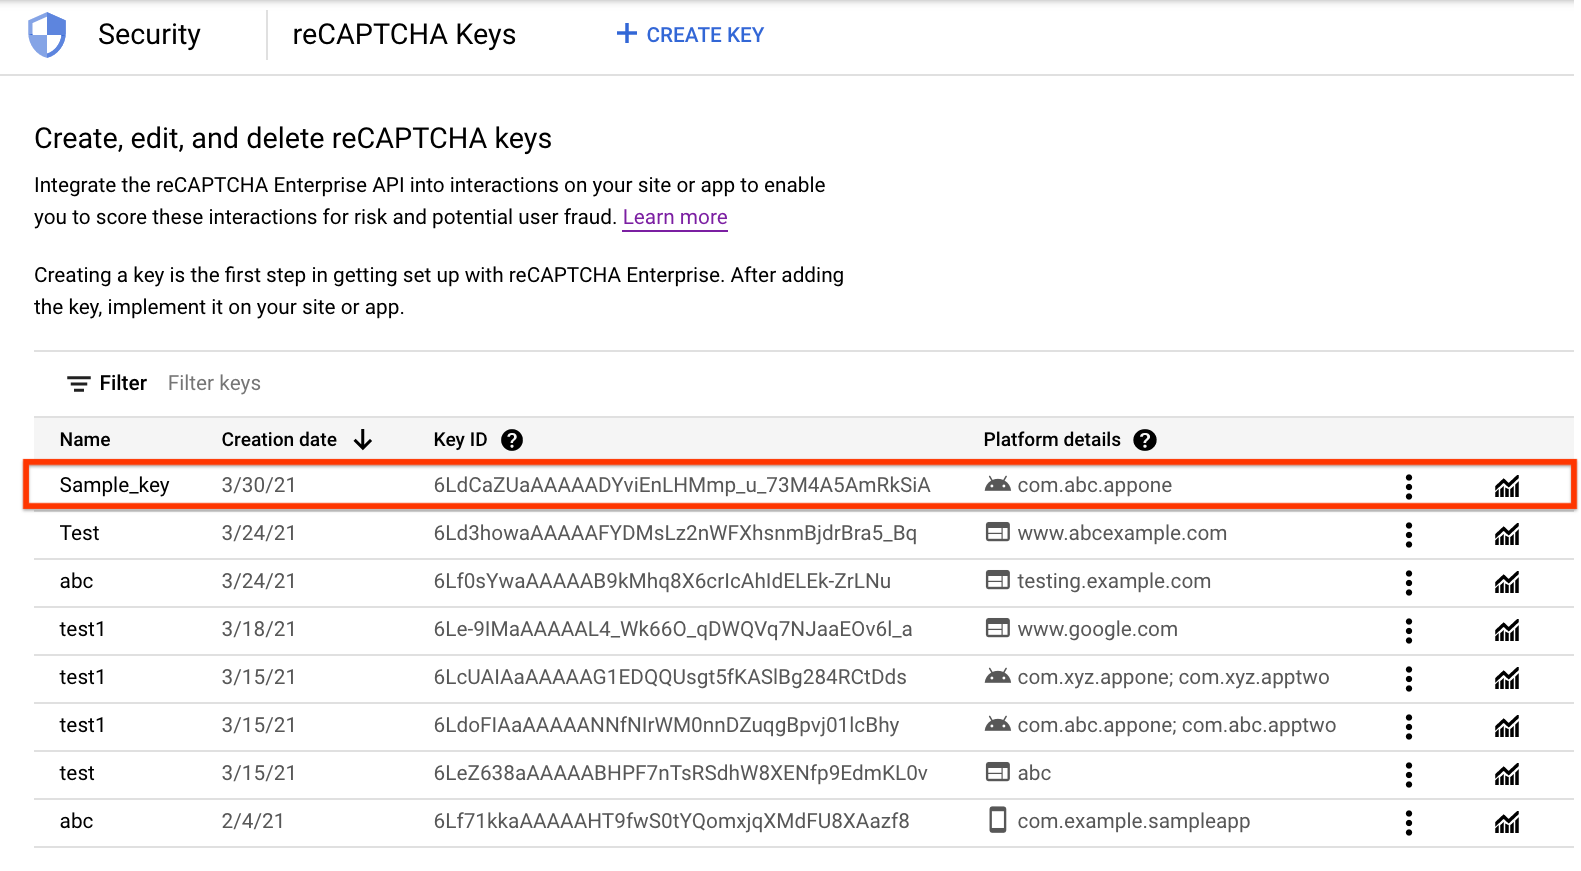
The newly created key is listed on the reCAPTCHA keys page.
Create site keys for mobile applications
You can create only score-based site keys for mobile applications.
- From the Cull platform type drop-down menu, select Android app or iOS app.
- Depending on the platform yous selected, enter Android packages or iOS bundle IDs.
If you selected Android app, practice the following:
- In the Android parcel list section, click Add Android package.
-
In the Android parcel field, enter the name of your Android bundle.

- Optional: To add together an additional packet, click Add Android package and enter the name of another Android package in the Android bundle field.
If you selected iOS app, do the following:
- In the iOS bundle ID list section, click Add iOS bundle ID.
-
In the Bundle ID field, enter the name of your iOS parcel ID.
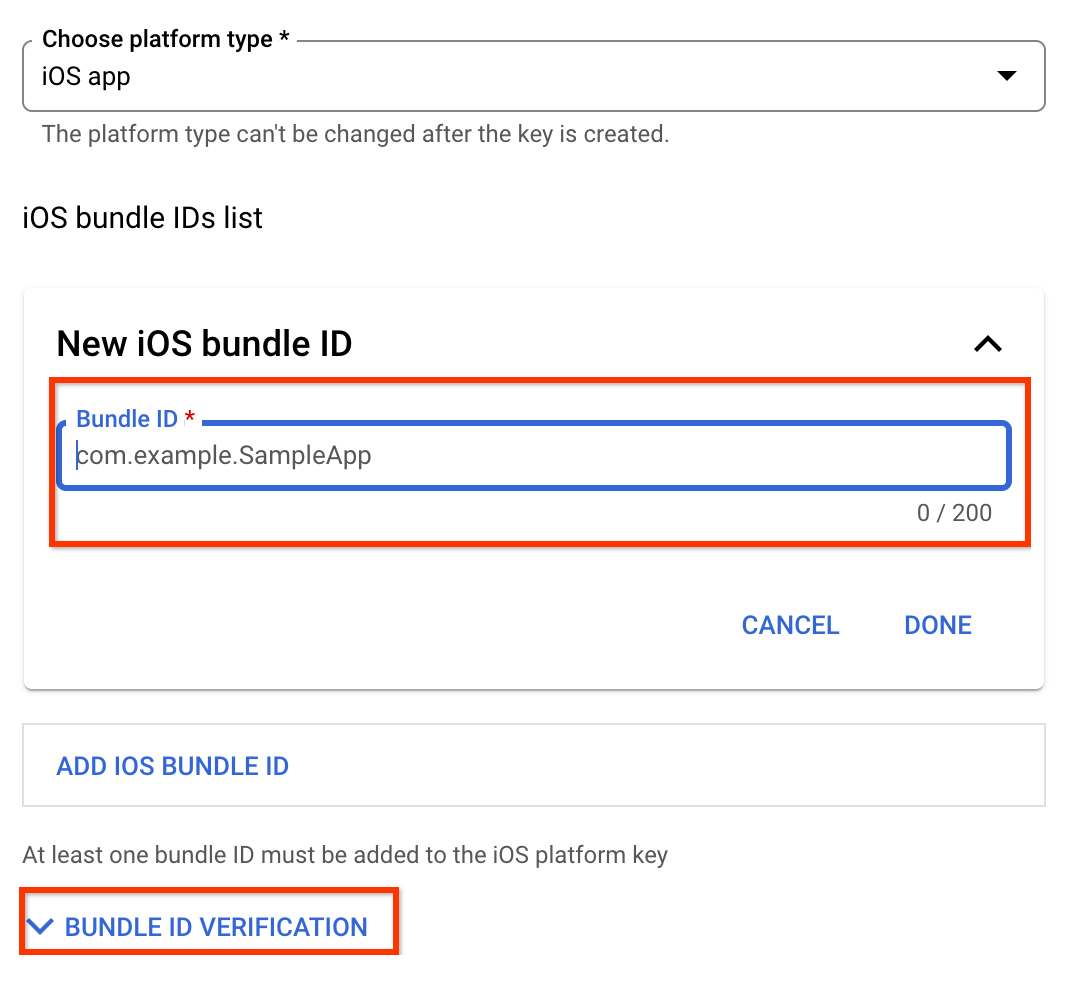
- Optional: To add together an additional packet ID, click Add iOS bundle ID and enter the proper name of your iOS package ID in the Bundle ID field.
For mobile applications, the reCAPTCHA site central is unique to the specified package names (for example,
com.google.recaptcha.test). - Click Create key.
The newly created key is listed on the reCAPTCHA keys page.
-
Remainder & CMD LINE
For API reference information most cardinal types and integration types, see Central and Integration type.Before using any of the request data, make the post-obit replacements:
- PROJECT_ID: your Google Deject project ID
- DISPLAY_NAME: display name for the key
- DOMAINS (for websites just): domains or subdomains of websites allowed to utilize the key. Specify multiple domains every bit a comma-separated list.
- TYPE_OF_INTEGRATION (for websites but):
SCOREorCHECKBOX. - PACKAGE_NAMES (for Android apps only): Android package names of apps allowed to employ the key. Specify multiple package names as a comma-separated list.
- BUNDLE_IDs (for iOS apps only): iOS packet ids of apps allowed to use the primal. Specify multiple bundle IDs as a comma-separated listing.
HTTP method and URL:
POST https://recaptchaenterprise.googleapis.com/v1/projects/PROJECT_ID/keys
Request JSON body:
To create keys for websites: { "displayName": "DISPLAY_NAME", "webSettings": { "allowedDomains": "DOMAINS", "integrationType": "TYPE_OF_INTEGRATION" } } To create keys for Android apps: { "displayName": "DISPLAY_NAME", "androidSettings": { "allowedPackageNames":"PACKAGE_NAMES" } } To create keys for iOS apps: { "displayName": "DISPLAY_NAME", "iosSettings": { "allowedBundleIds":"BUNDLE_IDs" } } To transport your request, choose i of these options:
curlicue
Relieve the request body in a file called request.json, and execute the following command:
whorl -X POST \
-H "Potency: Bearer "$(gcloud auth application-default impress-access-token) \
-H "Content-Type: awarding/json; charset=utf-8" \
-d @request.json \
"https://recaptchaenterprise.googleapis.com/v1/projects/PROJECT_ID/keys"
PowerShell
Salvage the request body in a file chosen request.json, and execute the post-obit command:
$cred = gcloud auth application-default impress-admission-token
$headers = @{ "Dominance" = "Bearer $cred" }Invoke-WebRequest `
                                -Method Mail service `
                                -Headers $headers `
                                -ContentType: "application/json; charset=utf-eight" `
                                -InFile request.json `
                                -Uri "https://recaptchaenterprise.googleapis.com/v1/projects/PROJECT_ID/keys" | Select-Object -Expand Content
You should receive a JSON response similar to the following:
{ "proper name": "projects/project-id/keys/6Ldqgs0UAAAAAIn4k7YxEB-LwEh5S9-Gv6IIWB8m", "displayName": "DISPLAY_NAME", "webSettings": { "allowAllDomains": false, "allowedDomains": [ DOMAINS ], "allowAmpTraffic": false, "integrationType": "SCORE", "challengeSecurityPreference": "CHALLENGE_SECURITY_PREFERENCE_UNSPECIFIED" } } gcloud
Utilise the gcloud recaptcha keys create command as shown in the following examples:
-
To create keys for websites, use the post-obit command:
gcloud recaptcha keys create \ --spider web \ --display-proper name=DISPLAY_NAME \ --integration-blazon=INTEGRATION_TYPE \ --domains=DOMAINS
Provide the following values:
- DISPLAY_NAME: name for the cardinal. Typically a site name.
-
INTEGRATION_TYPE: Type of integration,
SCOREorCHECKBOX. -
DOMAINS: Domains or subdomains of websites allowed to utilize the primal. Specify multiple domains every bit a comma-separated list.
-
To create keys for Android apps, use the following control:
gcloud recaptcha keys create \ --android --package-names=PACKAGE_NAMES \ --display-name=DISPLAY_NAME
Provide the following values:
- DISPLAY_NAME: name for the fundamental. Typically an app proper name.
- PACKAGE_NAMES: Android parcel names of apps allowed to use the key. Specify multiple bundle names as a comma-separated list.
-
To create a cardinal for iOS apps, use the following command:
gcloud recaptcha keys create \ --ios --bundle-ids=BUNDLE_IDS \ --display-proper noun=DISPLAY_NAME
Provide the following values:
- DISPLAY_NAME: name for the key. Typically an app name.
- BUNDLE_IDS: iOS package ids of apps allowed to utilise the fundamental. Specify multiple bundle IDs equally a comma-separated list.
The post-obit example shows a sample output of creating a fundamental using the gcloud recaptcha keys create command.
Created [6Ld3howaAAAAAFYDMsLz2nWFXhsnmBjdrBra5_Bq].
What's next
- Install score-based site keys or checkbox site keys on web pages.
- Integrate mobile keys inside iOS apps or Android apps.
- Implement the reCAPTCHA Enterprise for WAF and Google Deject Armor integration.
Except every bit otherwise noted, the content of this page is licensed nether the Creative Eatables Attribution 4.0 License, and lawmaking samples are licensed under the Apache 2.0 License. For details, see the Google Developers Site Policies. Java is a registered trademark of Oracle and/or its affiliates.
Final updated 2022-06-06 UTC.

Where On Google Do I Register A Recaptcha Key,
Source: https://cloud.google.com/recaptcha-enterprise/docs/create-key
Posted by: sancheztherinchis.blogspot.com
0 Response to "Where On Google Do I Register A Recaptcha Key"
Post a Comment